Showing posts with label DIY projects. Show all posts

Tuesday, March 25, 2014

Flower Arranging

Hey all
I wanted to share a little DIY project that takes 10-15 mins and can be as expensive as you'd like it to be.  I don't know if I should call it "Flower Arranging", because all that I am doing is purchasing flowers and cutting them to the heights that I prefer... I guess I can pretend to be a florist for a day:)  I am obsessed with having fresh flowers around my house.  They are so beautiful and enjoyable, and for some silly reason, make me so happy when I see them.  I think they make the house fill warm and cozy, and it's a memory I want my children to have.  Their mama always having fresh flowers in their home.  I'm warning you there are lots of pics, because I chose to do two different arrangements.  Just a heads up! (And just because of the way the pics are taken, the first three images will be smaller, the sidebar images overlap onto the images)


Alright, first and funnest step: Decide which flower(s) you'd like
to have.  I am obsessed with roses, so they are and will always
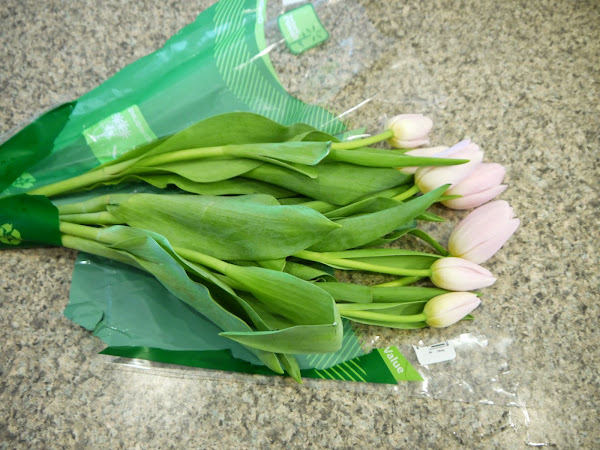
be my go to flower.  I also chose some light pink tulips.  Such a perfect 
spring flower.  (I got both bouquets of flowers from walmart.  It is definitely
a hit or miss, so when they have a fresh selection, I stock up.  Otherwise I 
head on over to costco.  Roses were $10, and tulips were $5)
You'll need flowers (obviously), vase(s), mason jars, 
wine bottles, anything that will hold the flowers, and scissors

I don't like my flowers to be towering over the vases, so I cut my 
flowers so they are a few inches out from the top of the vase.  
I also don't fill my vase up with water until after all my flowers
have been cut, that way I don't continually have water flying out
with the flower when I am pulling it out of the vase and putting it back in.

Less is more, so if this is your first time doing this, only cut small
sections of the stem off at a time.  Cut, place in vase, and repeat if needed.
Remember to cut stems on an angle

After I am satisfied with the height of the flower, I remove 
unwanted leaves.

I only remove the lower leaves from the steam.  I always
leave the top leaves alone.  Unless the top leaves are in the 
middle of the stem... then I cut them off.  I've found that if I leave
all the leaves on, the flowers get really crowded, and it doesn't
look as pretty.

When I finish with the first flower, I measure the other flowers
to the first flowers length.  That way they will all be around the same
height.  

Fill the vase with water and add the flower food.  
I read in Better Homes and Gardens one time, that if
you added a penny to a vase of flowers, then they last longer.
I have yet to try this.  

I love how stems look in the clear water.  Weird I know
but it is one of the reasons why I love having flowers.

Pretty!!!
Now on to the tulips!

I don't mind if the tulips tower over the vase.  I think it looks
pretty when they are all flopping over the edge instead of
all perfectly upright.  It just seems more natural to me.
So I don't cut as much off the stem as I do with the roses

Compare the length of the stems to each other, so they
will be more or less even

Careful with tulip stems!  They are extremely fragile.  As I was pulling
a mangled leaf from the stem, I broke the stem in half.  Instead
of pulling leaves from tulip stems, I would just cut as close to the place where
the stem and leaf meet.

I still used the broken flower, I just cut off the jagged edge 
to make it even

And tucked it in among the other tulips where it can be
supported.  You will just have to remember to watch the
water level and make sure that this little flowers' stem is 
always submerged in water

I always save the clear wrapper that the flowers come in.  That way
when I am all through with the stem cutting and leaf removal, I throw
everything all on the wrapper, wrap it up and throw it away in just one
step.  

And here you go.  Two totally different looks. 
Which is your favorite?
I hope you enjoyed the DIY tutorial.  If you are going
to be doing an arrangement anytime soon, upload it to 
instagram and tag me (@jaimeytripp)  I would LOVE to 
see how it/they turn out.  
Lots of Hugs XXXxxxXXXxxx
Jaimey


Wednesday, March 19, 2014

Lemon & Ginger Honey Tea

***Just a friendly reminder that the Tukula GIVEAWAY ends TOMORROW 3/20/14 at 10pm MST.  If you missed the post you can read about it here.  P.S. Friends and Family even though you know me, you are more then welcome to enter the giveaway.  It is randomly picked so everyone has a fair chance at winning****

Well the Tripp Family seems to be down this week with a nasty Spring cold.  I hate being sick, I think as a parent you should be exempt from sicknesses.  When I was pregnant with Lilah I had a really bad head cold. I called the baby line to see if there was anything safe I could take to relieve the symptoms.  I asked specifically about Air-borne.  The lady told me I couldn't take anything but the thing that really helps get over a cold is an extra hour of sleep everyday.  Uh.... Ya right.  I have a toddler and getting sleep is already hard enough.  Now that I have two toddlers, I'm not even going to try.  So all you mommy's out there who get colds and are not able to get extra hours of sleep each day, here is a little something that may just help you.

I love drinking this tea.  It warms me up when I have the chills, and soothes sore throats, and runny noses. For a little while anyway.  But hey, any relief is better than no relief right?  I know tea is not every one's thing, but please just try this little recipe I've created.  Ok?!  It doesn't taste like dirty water, or tree bark water lol. Although, I can't honestly say I've tried those... to me this tastes a little like sweetened warm/hot lemonade.


Here are the main ingredients you'll need.
Twinings Lemon & Ginger tea is what I use.  (From Wal-mart)
Raw honey:  You should research the benefits of Raw honeyvs. regular honey.  I like raw honey, but if 
you don't just use regular.
Lemons: Rich in Vitamin C, and helps flush toxins from the body. Not to mention
that the smell of citrus helps give you a boost in energy.

Boil some water on the stove.  Preferably in a teapot, since that's why they were created.... But if 
you don't have one like I obviously do not, then boil water in a saucepan.  I don't technically boil
 the water.  I just watch for steam to start forming and then I call it good.  While you're waiting, 
cut the lemon in half and remove the seeds from one of the halves.

Pour the boiled water into a mug or teacup.  This is my Royal Albert mug.  I am obsessed with it!
It's from amazon if you're wondering.  Add the tea bag to the boiled water and let steep 3-5 mins.
Remember the longer it steeps the stronger it'll be.

Remove the teabag from the tea  Squeeze some of that yummy lemon into the lemon & ginger tea...
I use about half of a lemon.  But, if this is your first time, less is more.  You don't want it to be too 
sour.  (don't forget to remove the lemon seeds or you'll be fishing them out, and that is annoying.)

Add the honey to the tea.  I am just guessing here, but I use about a tsp of honey give or take.
Start with less and then add more,  once you've done this a few times you just sort of guesstimate.  
Sorry I don't know the exact measurements.

Stir it all together and enjoy your delicious lemon & ginger honey tea.
What do you guys think???

Hope you get feeling better soon!
Hugs XXX 
             Jaimey


Tuesday, March 11, 2014

Nail Festivities

Hey you guys!  I thought I would do a little DIY nail post.  St. Patty's Day is coming up and for those of you who don't like to look like a walking green person this might be the post for you.  Sometimes it's fun to do something you wouldn't normally do.  For instance, I am 100% positive I have NEVER worn green nail polish EVER.  But there is a first for everything and honestly, the green kind of worked for me.  Triston's favorite color is green, so I scored "Cool Mom" points there lol.

I just want to clarify that I AM NOT a professional nail person. (Obviously)  But to my kids I am :)  I just wanted to do something different so I hope you find a little inspiration from my nail art and you all are brave enough to try it as well.  Happy Nail Day.  Hugs XxXxXx
                                                                                       Jaimey


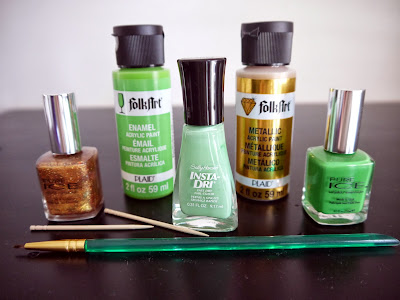
First off, find/buy some green and gold nail polish.  I bought some paint
as well because I feel like it is easier to work with, as opposed to actual
 nail polish.  You'll also need a fine tipped paint brush, toothpicks, paper towel,
 paper plate, and top coat (not pictured...sorry) and whatever else
your imaginations think of.


Paint your nails however you want them painted.  Let dry


Squirt a small amount of paint on the plate and let your inner 
Picasso loose (Here's a little advice.  If you're drawing lines, try not to
 let the brush bristles flare, this will make your lines fatter and 
look smudged.   Use the tooth picks for polk-a-dots.  I used both 
paintbrush and toothpick and the dots with the toothpick 
were cleaner and nicer looking.

Here are my finished nails.  What do you think?  Sorry, 
I wanted to get a picture of me actually doing my nails, but alas..
I only have two hands and Tyler wasn't home.
The paint colors are Antique Gold and Lime Green
both from Walmart ($1.97ish)

Sally Hansen Insta Dry "Jade Jump" $4 Walmart

Pure ICE "Studette"  $1.97 Walmart

Pure ICE "Free Spirit" &1.97 Walmart