I wanted to share a little DIY project that takes 10-15 mins and can be as expensive as you'd like it to be. I don't know if I should call it "Flower Arranging", because all that I am doing is purchasing flowers and cutting them to the heights that I prefer... I guess I can pretend to be a florist for a day:) I am obsessed with having fresh flowers around my house. They are so beautiful and enjoyable, and for some silly reason, make me so happy when I see them. I think they make the house fill warm and cozy, and it's a memory I want my children to have. Their mama always having fresh flowers in their home. I'm warning you there are lots of pics, because I chose to do two different arrangements. Just a heads up! (And just because of the way the pics are taken, the first three images will be smaller, the sidebar images overlap onto the images)

Alright, first and funnest step: Decide which flower(s) you'd like
to have. I am obsessed with roses, so they are and will always
be my go to flower. I also chose some light pink tulips. Such a perfect
spring flower. (I got both bouquets of flowers from walmart. It is definitely
a hit or miss, so when they have a fresh selection, I stock up. Otherwise I
head on over to costco. Roses were $10, and tulips were $5)
You'll need flowers (obviously), vase(s), mason jars,
wine bottles, anything that will hold the flowers, and scissors

I don't like my flowers to be towering over the vases, so I cut my
flowers so they are a few inches out from the top of the vase.
I also don't fill my vase up with water until after all my flowers
have been cut, that way I don't continually have water flying out
with the flower when I am pulling it out of the vase and putting it back in.

Less is more, so if this is your first time doing this, only cut small
sections of the stem off at a time. Cut, place in vase, and repeat if needed.
Remember to cut stems on an angle

After I am satisfied with the height of the flower, I remove
unwanted leaves.

I only remove the lower leaves from the steam. I always
leave the top leaves alone. Unless the top leaves are in the
middle of the stem... then I cut them off. I've found that if I leave
all the leaves on, the flowers get really crowded, and it doesn't
look as pretty.

When I finish with the first flower, I measure the other flowers
to the first flowers length. That way they will all be around the same
height.

Fill the vase with water and add the flower food.
I read in Better Homes and Gardens one time, that if
you added a penny to a vase of flowers, then they last longer.
I have yet to try this.

I love how stems look in the clear water. Weird I know
but it is one of the reasons why I love having flowers.

Pretty!!!
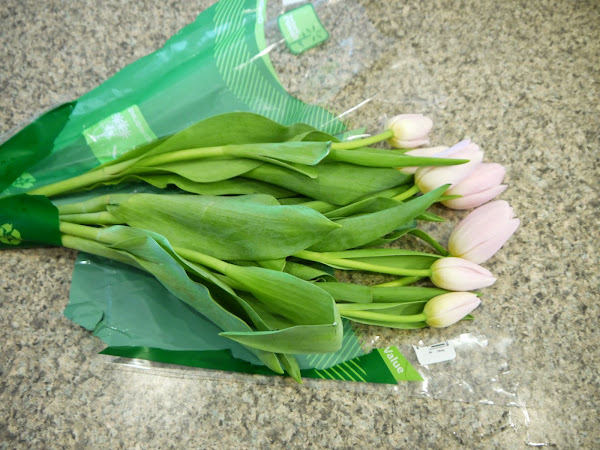
Now on to the tulips!

I don't mind if the tulips tower over the vase. I think it looks
pretty when they are all flopping over the edge instead of
all perfectly upright. It just seems more natural to me.
So I don't cut as much off the stem as I do with the roses

Compare the length of the stems to each other, so they
will be more or less even

Careful with tulip stems! They are extremely fragile. As I was pulling
a mangled leaf from the stem, I broke the stem in half. Instead
of pulling leaves from tulip stems, I would just cut as close to the place where
the stem and leaf meet.

I still used the broken flower, I just cut off the jagged edge
to make it even

And tucked it in among the other tulips where it can be
supported. You will just have to remember to watch the
water level and make sure that this little flowers' stem is
always submerged in water

I always save the clear wrapper that the flowers come in. That way
when I am all through with the stem cutting and leaf removal, I throw
everything all on the wrapper, wrap it up and throw it away in just one
step.

And here you go. Two totally different looks.
Which is your favorite?
I hope you enjoyed the DIY tutorial. If you are going
to be doing an arrangement anytime soon, upload it to
instagram and tag me (@jaimeytripp) I would LOVE to
see how it/they turn out.
Lots of Hugs XXXxxxXXXxxx
Jaimey


